 Vinyl floor replacement begins with the removal of the subfloor cover and then onto prep and installation. Although it’s not very complicated to replace vinyl floors, it is really labor intensive. In fact, vinyl floor removal is one of the most difficult home improvements to undertake. So, read on to learn more about vinyl floor replacement and disposal.
What to Know about Vinyl Floor Disposal
Before you start on that vinyl flooring removal project, understand that it’s not like throwing out any household trash. Actually, it’s considered remodeling or construction debris. Meaning, you can’t just put it in the trash bin. So, the local trash collection agency won’t pick it up.
Let’s be clear: It’s no fun to remove vinyl flooring. Peeling up the material itself is no picnic, but the real trial is to get rid of the glue that had been securing the vinyl to the subfloor. The only silver lining here is that while tedious and time-consuming, it’s certainly not complicated to remove vinyl flooring. No special tools or advanced skills are required. It’s really only a matter of elbow grease. —Bob Vila
Also, you could discover some unpleasant surprises, like what’s known in the flooring industry as “pet damage.” Essentially, this is a euphemism for dry, stale pet urine stains soaked into the subfloor. Which means you might need to get rid of any more stuff, as well.
The best way to do this is to call a local junk removal service to come and pick up and haul away the debris. This way, you can take advantage of the opportunity and offload a bunch of other unwanted stuff at the very same time.
Vinyl Floor Replacement Guide for Grass Valley Property Owners
To begin the vinyl floor replacement process, you’ll first need to empty out the room. Don’t leave anything behind, including any decor and/or furniture. Then, do the following:
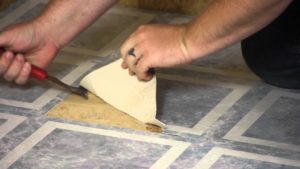
- Pull up a corner. Much like removing carpet from a space, you need to start in a corner. This is where it’s easiest to grab ahold of the vinyl to pull up. If one corner is too difficult, just try another. Use pliers or another tool to grab a corner and begin to pull it away from the subfloor. But, do this will caution so you don’t damage the subfloor.
- Remove the adhesive. Use a floor scraper to remove the adhesive from the subfloor. Be careful not to gouge into the subfloor or to run the floor scraper into walls or cabinets. Remove any adhesive that does not come up using a scraper with adhesive remover. Follow the manufacturer’s application instructions carefully.
- Dry and clean the subfloor to finish. After the adhesive is gone, you can then use a shop-vac or wet-dry vac to clean up any remaining debris. Once the adhesive is the completely gone, you can then deep clean the subfloor to install a new floor covering.
Once you’ve taken up all the vinyl floor, go ahead and phone 800-433-1094 or visit Junk Garbage Removal.