 DIY wainscoting removal. Sounds really simple — doesn’t it? Well, it is usually fairly straightforward. But, there are some challenges you might face. For instance, what’s behind the wainscoting. Or, how to avoid damaging the wall or something else. Wainscoting removal isn’t necessarily difficult. Meaning, it does not require special skills or tools. But, it’s not all that easy because it does require a bit of patience. The reason is when you remove wainscoting, you need to avoid damaging the wall behind it. Otherwise, you create more work and incur an added expense.
About Wainscoting Disposal
The biggest challenge won’t be removing the Wainscoting. Nope. That’s actually the easy part of the process. What will pose the biggest problem is what to do with the debris material. When you remove things like Wainscoting and/or trim, or any other type of paneling, you create a whole lot of debris. So, you’ll have to do something with it.
Many people choose to err on the side of security when opting for glue instead of nails to hang wood paneling. If they ever have to remove the paneling, however, they may end up regretting their conscientiousness. Not only is the paneling more difficult to remove, glue residue remains on the wall, and it won’t come off without at least some damage to the wall material. —San Francisco Gate
In most cases, you won’t be able to simply throw it out with the rest of the household trash. Instead, you’ll either need to load it up and haul it to the proper disposal facility or have a local junk hauler come in a take care of it. (The latter option not only takes it off your hands but also allows you to offload a bunch of unwanted stuff at the same time.)
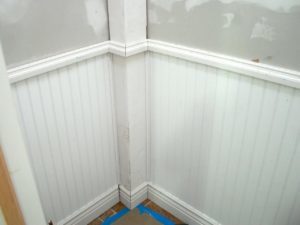
Kirkwood DIY Wainscoting Removal Guide
To start the wainscoting removal process, you’ll need a few common tools. Once you have your tools ready, follow these DIY wainscoting removal steps:
- Break the seal. Wainscoting is usually installed sealed against the walls. This is typically done with caulk so moisture cannot get between the paneling and the walls to form mold. Use a utility knife to cut into the seal gently across the top of the wainscoting, going around the entire room.
- Remove all the nails. After you cut the seal, you can then locate the nails fastening it to the wall and pull them out, one at a time. This will take some time but shouldn’t be too difficult.
- Pull of the baseboards. You’ll need a pry bar again to pull away the baseboards. Exercise caution, especially if you have hardwood floors, so you don’t accidentally gouge them.
- Take the panels off the wall. With the top railing off and the baseboards off the wall, you can then simply pull the panels away from the wall to finish.
When you need remodeling debris removal, just phone 800-433-1094 or visit Junk Garbage Removal.